

This Arduino electronics tutorial illustrates how to use Photodiode as a light sensor with Arduino. When light impinges on the photodiode LED, current is produced and thereby voltage is generated which is captured by the ADC(Analog Digital Converter) of the Arduino. The amount of current/voltage generated by the Photodiode depends upon the light intensity falling onto the photodiodes hence measuring the light intensity. Because the photodiode produced voltage is directly related to amount of light intensity, the photodiode is often called light sensor, light detector, optical detectors or photodetectors. The voltage generated due to the photodiode is then displayed on the serial monitor using Arduino IDE. Here we will use Arduino Nano to detect the voltage produced by the photodiode. Photodiode circuit with Arduino is provided and program code is also provided. Video demonstration is also provided.
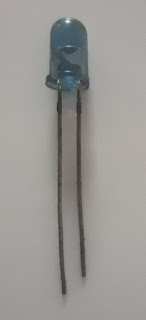
There are various types of Photodiodes such as Photodiode LED, PIN photodiode, Schottky Barrier Photodiode and Avalanche Photodiode. They differ mainly in the construction and due to this they have varying sensitivity to light. The function of photodiodes is to convert light signal into either voltage or current based
on mode of operationThese all Photodiode are designed to operate in reverse bias condition. That is the cathode is connected to +ve supply and anode is connected to ground.
Arduino Photodiode & Interfacing Circuit Schematic Drawing
The following picture shows interfacing of Arduino Nano with Photodiode LED and 1MOhm resistor on breadboard.

The following shows the circuit wiring diagram of Photodiode with Arduino Nano and 1MOhm resistor.

In the above Arduino light sensor circuit, the Photodiode is connected in reversed biased configuration. That is the anode is grounded while the cathode is connected to +5V. The cathode side is connected to the analog pin A4 of the Arduino.
Arduino code for Photodiode Light Sensor
The Arduino code for photodiode sensor is below. The purpose of this code is for measuring light with photodiode with the help of Arduino. The program reads in the current/voltage variation with light intesity from analog pin A4. This is then displayed as measured voltage on the serial monitor.
//Program for Photodiode Light detection with Arduino
//Source: https://ee-diary.blogspot.com//alias pin name for Photodiode
int photodiodePin = A4;
void setup(){
Serial.begin(9600); //set Serial output baud rate
//For output format
Serial.println("nVoltage(V):");
Serial.print("--------------------------------------------------n");
}
void loop() {
int anaValue = analogRead(photodiodePin); // potentiometer voltage
float voltage = 5-(anaValue/1024.0)*5;
Serial.println(String(voltage,2)+"V");
delay(2000); //delay 2000ms to prevent any duplicates
}
In this tutorial we have shown how to use a LED Photodiode to measure light intensity with Arduino. Other example of application where photodiodes are popular is obstacle detection used in robotics and industrial machinery. In this applications, photodiodes are commonly called Infrared Sensor(IR sensor). An example of object detection using Photodiode module with Arduino was illustrated in IR sensor with Arduino, LCD, Buzzer and LED.


