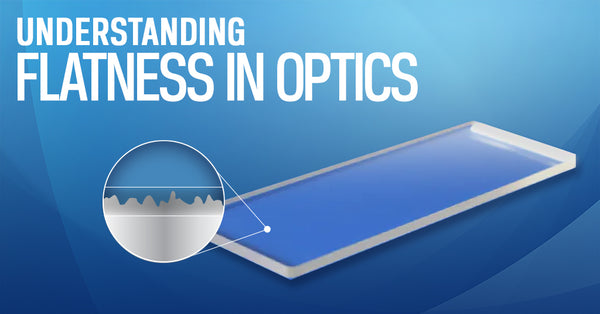
Precision flatness refers to the degree of variation across a plano surface, and it is a critical aspect in the production of optical components where even slight deviations can lead to performance issues. Applications such as semiconductor wafer manufacturing, optical systems, and precision machining demand surfaces with exceptional surface flatness to ensure the desired functionality and performance of the final product.
What defines flatness?
Flatness is not determined by the degree of conformity between a part and its specified dimensions; rather, it is a characteristic entirely separate from the overall shape of the part. Even if parts meet their dimensional requirements, they may still lack flatness in certain features. Consequently, the specification of flatness for a surface is distinct and unrelated to other dimensions. Top metrology equipment are essential for ensuring the accuracy, precision, and quality of optical measurements, components, and systems.![]() This is where tolerance specifications play a crucial role. If the irregularities of a surface exceed the boundaries set by a tolerance zone, it fails to meet the flatness requirements outlined in the specification. Flatness essentially refers to the variation between the highest and lowest points on a surface in relation to a specified tolerance zone. Tolerances are typically specified in terms of deviation from a perfectly flat surface, measured in waves or fringes or expressed in units like micrometers (μm). Achieving and maintaining precise flatness requires an understanding of tolerances and measurements such as Root Mean Square (RMS) and Peak-to-Valley.
This is where tolerance specifications play a crucial role. If the irregularities of a surface exceed the boundaries set by a tolerance zone, it fails to meet the flatness requirements outlined in the specification. Flatness essentially refers to the variation between the highest and lowest points on a surface in relation to a specified tolerance zone. Tolerances are typically specified in terms of deviation from a perfectly flat surface, measured in waves or fringes or expressed in units like micrometers (μm). Achieving and maintaining precise flatness requires an understanding of tolerances and measurements such as Root Mean Square (RMS) and Peak-to-Valley.
![]() Root Mean Square (RMS) Measurement:
Root Mean Square (RMS) Measurement:
RMS is a statistical measure that provides insight into the average deviation of surface irregularities from the mean plane. In precision flatness, RMS is often used to quantify the overall roughness of a surface. Unlike peak-to-valley measurements, RMS considers the entire surface profile, providing a more comprehensive assessment of flatness.
Mathematically, RMS is calculated by taking the square root of the average of the squared values of the surface deviations from the mean. This measurement is valuable for characterizing the smoothness of a surface, giving manufacturers a quantitative metric to assess and improve flatness. ![]()
Peak-to-Valley Measurement:
Peak-to-Valley is a more straightforward measurement, representing the difference between the highest peak and the lowest valley on a surface. This metric provides a quick assessment of the surface’s overall variation. While it may not capture the nuances of the entire surface profile like RMS, Peak-to-Valley remains a widely used indicator of flatness, especially in applications where specific features or points are critical.
Precision flatness is a fundamental requirement in industries where high-performance components are essential from semiconductor manufacturing to aerospace engineering. Tolerances, RMS, and Peak-to-Valley measurements are key elements in assessing and achieving the desired flatness levels. As technology advances and industries demand even greater precision optics, working with a vendor who has a deep understanding and mastering these measurements will continue to be vital for ensuring the quality and reliability of products across various sectors. More details are available, and please contact our Esco optical engineers with any needs.


